Monday 16 August 2010

Viking Woman


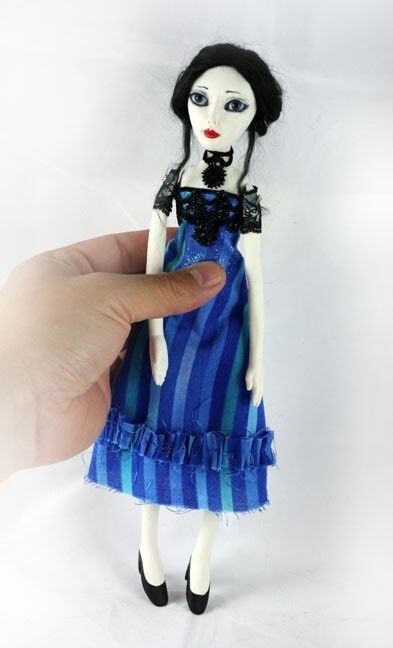
Viking women were not allowed to take part in battle, but if they conquered new land, women would have to come so that a permanent settlement could be build up.Women would have taken their children and all their live stock with them, so the voyage over the sea would not have pleasant. Women would only have gone on peaceful immigration trips, rather than raids.
But for example in england, there is evidence(in the form of women's jewelry)that viking women were there by the 10th century.The viking word for woman was Ginna. Pagen graves are wonderful, as they give us insight into the cultur of the vikings. In scotland there were two female graves found, of very diffrent women: the young, stout and wealthy mother of newborn twins from Westness, and the high-status, elderly woman from Scar, buried in a boat along with a younger man and a child, a matriarch, perhaps even a priestess of Freya.
The mythological poem Rígsþula, written down in medieval Iceland, accounts for the divine origin of the three main social classes. But it also gives us a snapshot of daily life in the Viking Age. The woman of the slave-class wears 'old-fashioned clothes' and serves bread that is 'heavy, thick, packed with bran... in the middle of a trencher', with 'broth in a basin'. The woman of the yeoman class wears a cap and a blouse, has a kerchief around her neck and 'brooches at her shoulders', and is busy with her spindle, 'ready for weaving'. The aristocratic woman is just busy preening herself: she wears a blouse of smooth linen, a spreading skirt with a blue bodice, a tall headdress and appropriate jewellery, and has very white skin. She serves silver dishes of pork and poultry on a white linen cloth, washed down with wine.The standard Viking Age house was rectangular and had just one room, in which everything took place around a central hearth. This house type has been found from Sweden in the east to Newfoundland in the west, in both rural settlements and in towns such as York and Dublin. As in most traditional societies, women spent much of their time indoors in such houses, cooking, making clothing and caring for children and the elderly, but they would also have had responsibility for the dairy.
Some women made their mark through exceptional status or achievement. One of the richest burials of Viking Age Scandinavia is that of the Oseberg 'queen', buried in a very grand style with a richly-decorated ship and large numbers of high-quality grave goods in 834. Later in that century, Aud the 'deep-minded' lived a veritable Viking Age odyssey. The daughter of a Norwegian chieftain in the Hebrides, she married a Viking based in Dublin and, when both her husband and son had died, took charge of the family fortunes, organising a ship to take her and her granddaughters to Orkney, Faroe and Iceland. She settled in Iceland, distributing land to her followers, and was remembered as one of its four most important settlers, and as a notable early Christian.( source:BBC )

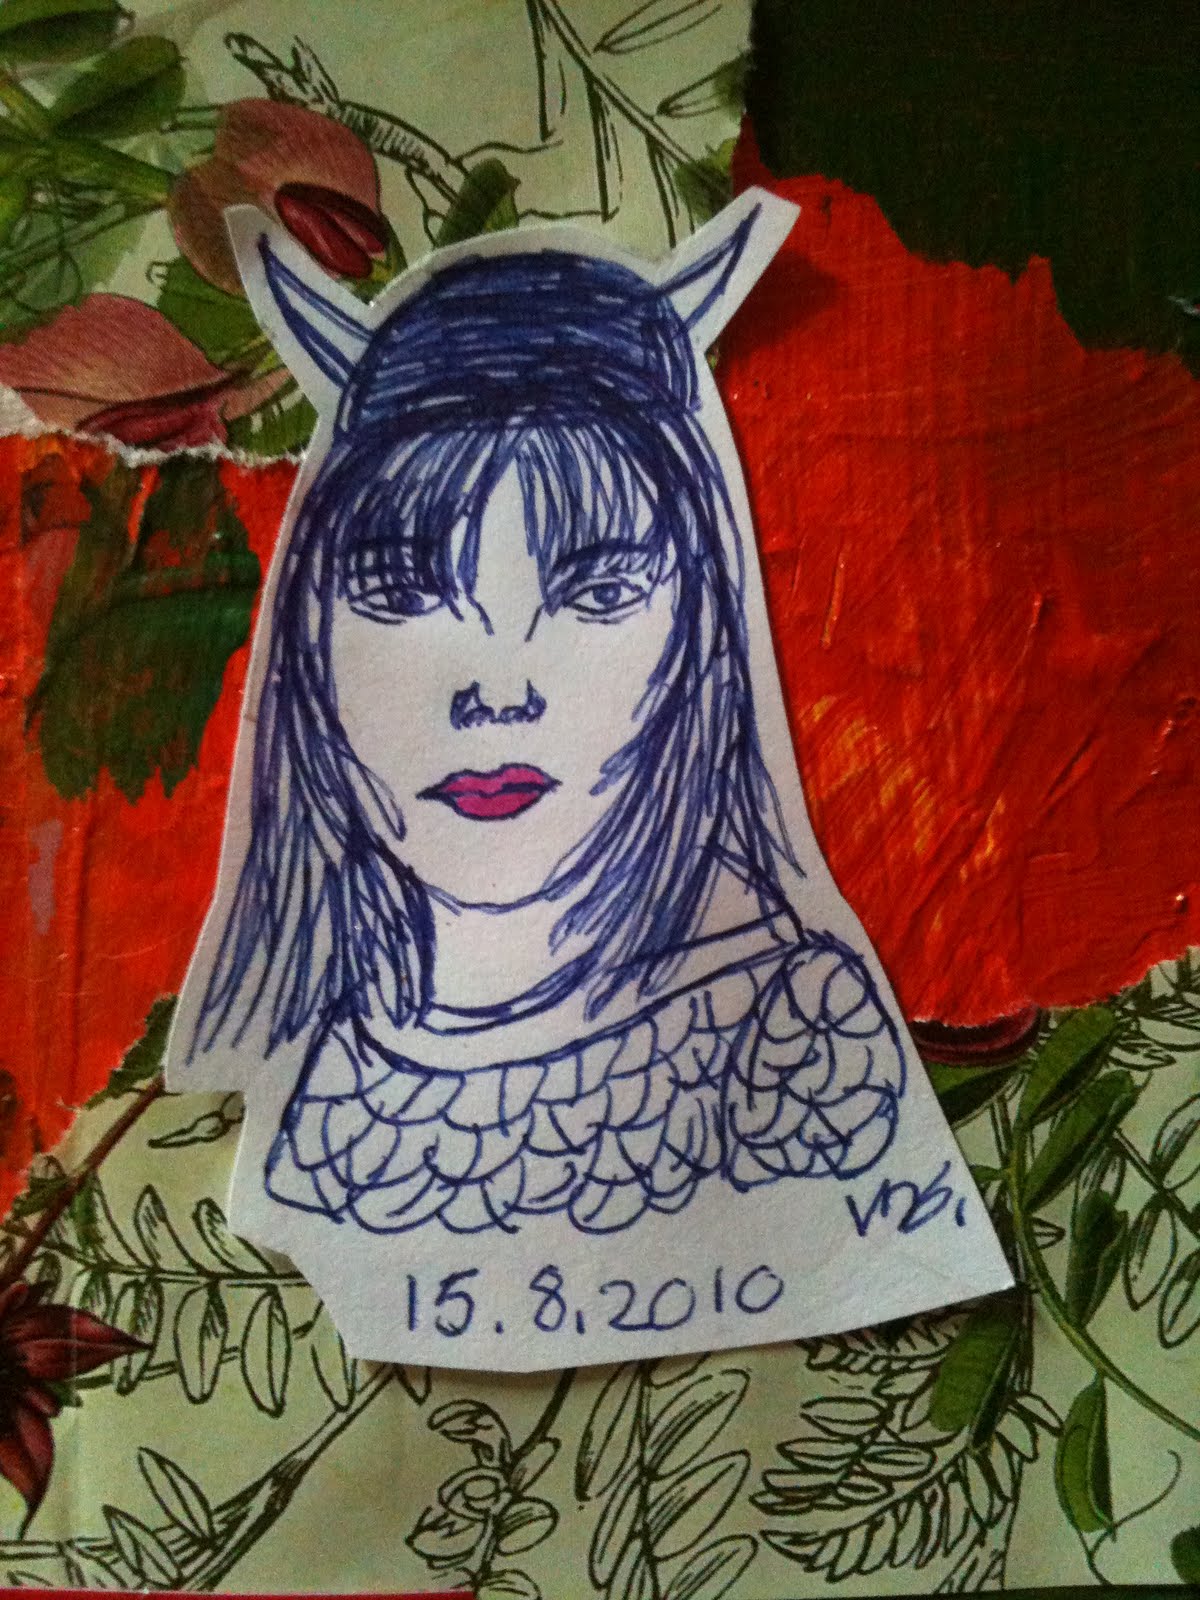
Yesterday I drew the viking woman above and I just love how she turned out and enjoyed the way in which I drew her. I want to draw one girl like this a day. What I do is take an image from a magazine and draw it using a cheap biropen. I cannot rub any thing out and have to accept the flaws and this really helps me love my drawings. When the image is complete, I have a good look at her and if she looks to me like something, in this case a viking, I add the feature needed to show this, in this case a viking helmet. I use an artists pitt pen to colour in one feature that I want to stand out. I love drawing in biropen!!

Thursday 12 August 2010

My first ever video: Stamping technique using a loorolltube


Here is my first ever vid!!!!
This is just a cool technique I thought of and thought it would be fun to share!!

Extra ideas:
  • You could vary the colour paint you use
  • You could stamp it in a way, so that it gives you a flower shape
  • You could use to create a border
  • you could use to stamp a circular template either on patterned papers or on cardstock, which if you punch a hole into it makes a fab gifttag
  • You could stick in a photo or image and use it to circle something you want to draw to the viewers attention
  • You could paint a big fish or other animal and use these to create the eyes
  • You could use as a way of creating a circular template over an image and then you can glue down like an inchies page, but just circles, instead of squares
  • you could cut little triangles out of the rim of the loorolltube before you stamp and then you will get a broken lined circle( do you get what I mean)
  • you could stamp an image(using a normal stamp) and then customize it with your loo roll stamp( for example, by stamping it down and then painting over the image exept for the part with the cirlce around it)
The possiblities are endless and free!! Loorolltubes are not the only item of waste you can salbage for your art! What do you like to use? If you try this technique, please share photos,what are your suggestions on how to use?

Art supplies i am loving at the moment , a journal page and handcarved stamps!!!


Last week I finally got round to carving my own stamps. YAY!! I simply bought a piece of lino, cut down to size, drew on image and started to carve away. It was so much fun and very simple.I did find this vlog video by samantha kira very useful.But it really was so easy and fun. If you have never carved a stamp before, I recommend you watch the video by samantha kira, go abuy the supplies and get carving. I carved an arrow and a Mighty Boosh head( if you do not know this, watch a vid of it on youtube and you will laugh your head off!!!Link at end of article).


I have also created this cool journal page. I had so much fun creating it. First I scribbled around a bit with watersoluble neocolours and then I dry brushed some gesso over it. I did a biro pen drawing of a girls face and added a coloured bookpage t-shirt. i created the flower and then played around with pen and ink. Lastly i coloured in a few things with artists PITT pens.


These are a few art supplies I am loving lately. Mini alphabet stamp set(reat for spelling out words or to use for journaling instead of your own handwriting.), neocolours II in lots of cool colours, artists PITT pens in lots of colours, my brand new aluminum tape, pen and ink, gel medium and carving stamps!!!


What art supplies are you into at the moment?
Do you have any blogpost requests?


LINKS:
The Mighty Boosh: The power of the crimp(I think this is the best intro episode)

Saturday 7 August 2010

Cobra water mixable oil paint review


I saw this free sample Cobra paint tube today, when I was browsing my local art shop. I took a sample of course and as soon as I came home, I started testing out roughly how they work. But basically they are water mixable oil paints. It also says on the packaging that they wash out of fabric with water. This makes me so excited, because I am always getting acrylic paint on my clothes and this puts me off painting a bit, but only 0.1%. All the same, if it will wash out, this makes me super happy!!!
Anyway, I tried the paint out and it acts like a mixture between acrylic paint and oil paint. It still takes a while to dry, it has than oil paint glossiness about it and lets itself blend together like oil paints, but it blends well with acrylic paint (i did do this, but with an orangish red acrylic paint) and I have worked with both acrylic and oil before and when working with this, it just feels like a really fantastic feel to it. I friking LOVE this paint, when I next go there, I will buy myself some of this.
Now onto the next claim: it washes out of fabric.I am so happy about this factor and I tried it and it works. Above you can see before and after of a piece of fabric which I put some paint onto and then washed out. There is a kinda orangish tint to it, which was not what happend, the glue (I used my homemade glue, yay it glues fabric to:)), which I brushed over it, blended the colour onto the fabric. But before I glued it on, it had one tiny spec of paint on it. Click on the image and look at it in big and take a good look at it, you will see the effect.

So over all
  • 99% of the paint washes out
  • It takes long to dry
  • It blends well
  • It works in conjuction with acrylic paint to
  • It feels like working with a mix of oil and acrylic paint
I give these paint 8 out of 10. I will go buy some more of this, will you?
Have you tried this paint before? What did you think?

Their website is here.

Ps: Here is a fab new podcast, I have discovered called the VooDoo Lounge. Click on the podcast sidebar. and this website Carla Sonheim: Snowball Journal

have fun creating Art!!!

Thursday 5 August 2010

Being a Vegetarian- 101


I have been a vegetarian for about 6 weeks and it is therefore high time to tell you all what it means. Basically if you are a vegetarian, you cannot eat any meat, shellfish and sometimes fish( I have decided to eat fish for now) or glycerin( in jelly and gummi sweets and marshmallows) and you cannot buy any leather. So you need to make a few lifestyle changes.You cannot continue your normal diet and just leave out the meat. Because you body needs the nutrients in the meat to function,, so you need to eat other foods to replace theses nutrients.Lets have a little look at at what nutrients you need, why you need them, where to get and how much of it to eat.

Carbs: This stuff gives you energy and heps in bone/cartilage/nerve building and general body maintenance. Sources of carbohydrates are potatoes, root veg,bread,grains, pulses, whole grains,cereal, pasta, rice, noodles, fruit, oats,lentils, fruit, dried fruit, some dairy(such as milk), nuts, seeds and mushrooms. Should be a third of your daily diet.

Fruit and Vegetables: Prevents diseases,boost immune system, good for hair, skin, bone strength and is packed with vital vitamins, minerals, fibre, calcium, zinc and potassium.Every fruit will contain some of these, so just make sure you eat about 6 pieces of fruit or veg per day.

Milk and Dairy(calcium): Strengthens bones and teeth, contains lots of calcium, nutrients and minerals. Everything dairy so milk, cheese, yogurt, soy milk,soy beans, leafy green veg, sesame seeds, tahini, almonds, tofu, bread, oats, watercress, dried apricots,figs, brazil nuts, pistachios, pecans.Eat about 2 portions per day.

Protein: Growth, muscular repair,metabolism( essentials for growing and maintaining health).Complete protein found in quinea, egg whites, soy beans, soy protein. Incomplete protein(which has to be combined with another food group to release proteins) in dried/tinned beans, chickpeas, lentils, tofu, nuts, seeds,couscous, bulgur, wheat, whole grains, cereal, eggs,baked beans,yogurt, hummus, milk, cheese, broccoli, beans sprouts, peas, seaweed, sweet potato, dried apricots, avacado and miso. Eat 2-3 portions a day.

Fat: Essentials foe maintaning the body's processes- energy,activating vitamins and insulation. Can be found in butter, vegtable spread, soy milk/spread/oils. Cheese, cream, olive, rapeseed, sunflower oils and avacado. Eat 2 portions a day.

Iron: Low-iron diets can cause anaemia( its hard to focus, you feel and look flaky, no energy). Iron needs to be aeten with Vitamin C , so your body can absorb it. Vitamin C in orange/juice, kiwi, strawberry, potato, cabbage, broccoli, tomato, melon, asparagus, peppers, mago and black berries.Iron in Nuts, seeds, raisins, eggs, spinach, kidney,beans, chickpeas, black treacle, lentils,peanut butter, hummus, wholemeal flour, watercress, broccoli, spring beans, okra, spinach, breads and olives. Eat 2 portions a day.

Selenium: Boosts your immune system. In nuts(2 brazilnuts a day would cover it), wholemeal bread, eggs and brown rice. Eat daily.

Vitamin B12: Needed for nervous system and to keep blood healthy.Can be found in Eggs,dairy products, Vegemite, Marmite, soy milk, veg and sunflower seeds. Eat daily.

So there you go , that is a basic outline of what you can eat. If you want me to, I will create another post with some recipies and ideas on how to get all these foods into your diet.

RESOURCES
Vegetarian shoes
Peta

Tuesday 3 August 2010

Make your own Glue


Today I made some glue from this cool book called: Green Guide for Artists by Karen Michel.I made her recipe called: Rice paste. It was really fun to make, so her is the recipe:

95 grams of rice flour
26 grams of sugar
175ml of warm water
essential oil( this preserves the glue and stops it from smelling weird you can use Eucalyptus, Lavender, Lemon, Tea Tree or Sandalwood)

1. In a pot, combine rice flower, sugar and water. Stir until there are no lumps.
2.Stir over low heat until mixture has thickend. My glue was way to thick at this point, so I had to add more water, but once I had it was fine.
3.Remove from heat and mix in a few drops of essential oil.
4.Allow mixture to cool, then pour into a jar. You should have about a butter-cream consistency.

Apply this glue with a paintbrush , I dipped my paintbrush in water first and then apply to paper. This product last for several months:)

Above you can see my page for GPP Street-team Crusade entery, which I glued down with this cool glue. It woked wonderfully

Have fun!!!

Monday 2 August 2010

Creative Block?! GET YOUR WARPAINT ON!!!!!


Over the past two or three days I have just been sitting round reading magazines and watching youtube videos on how to sew clothes( yes I want to try) instead of acctually creating anything. I did do the picture above in my art journal, but it is horrible!!!!Ans more importantly I made myself do it and it was not fun. It is time to rise up and put some warpaint on ( aka liquid eyeliner) and get creative.
First let's go onto iHanna's art journaling catagory and see what ideas that gives us...
Hmmm... Maneki Neko Sketch ,
Sounds fun huh? So I went on google and found a cool pic of this cat and drew it.

Better than the girl painting and it was fun!!YAY!! So my tip for creative block: Go onto one of your fave art journaling websites, pick a post they did that looks fun and for which you have all the supplies, turn the music up and start mindlessly working.And voila!!!
At the moment I am really into japan, so i did a bit of research about this cat.
Basically:
Maneki Neko: means Beckoning Cat aka Welcoming Cat, Lucky Cat, Money Cat and fortune Cat.
The raised paw is not a greeting, but has a meaning. If the left paw is raised it means the statue or image will bring customers into a shop( they are commonly placed outside shops for this reason)and if the right paw is raised, it means wealth and good luck. A lot of people think that, the higher the cats paw is raised , the greater Luck or the greatest distance good fortune will come from.The cat normaly has a red collar, which may be red because it reminds of the red flower hichirmen, which was popular during the Edo period when it was first created( 1603-1867) and a bell and/or bib. The bib may be something to do with the bib which grateful parents are said to give to Jizo Botsatu, the protector of sick children.
The histiory of this cat is mysterious. It could be because emperors and other important people say that someone passed a cat, that was waving at him. thanks to being distracted by this cat, the man did not walk into a trap. Thats why cats are considered wise and lucky spirits.

I can't argue with cats being wise and lucky spirits!
I got the info from Wikipedia, there you can also read about the 3 legends around the actual cat statue.

So that did it for me. How do you go to war with your creative block?

Friday 23 July 2010

My own sponge adventure


Today I was down the town and went into a shop for lunch. On my way out I saw a pack of 13 sponges for 1 pound and so I bought it. They are multicolored makeup sponges (in pink, purple, white and blue). I came home and sat down to start playing with them and to watch Samantha Kira's Studio Vlog. Then what do I see? This week she is playing with sponges too. How weird is that. I thought my makeup sponges were amazingly cool to work with, they got me an awesome i smudged the paint with my fingers effect , but I did not get my hands dirty. I also found some bubble wrap and used it to create to prints and covered in paint applied with a makeup sponge. I had earlier today, drawn an Owls head. so I decided to cut it out and glue it down. I also used my red and orange shimmering H20 watercolours, a strip of patterned paper and some gelpens and pen and ink. To finish off this page, I wrote about me becoming a vegetarian. I have been for 3 weeks now and I think its fab.
Play with something cool in your journal and leave me a comment about it.


XXO MAKEALIFE

Wednesday 14 July 2010

Strip Ease


click to see lArge

I enjoyed last month crusade so much, I decided to give it ago this month to. Above is my page.
First i followed the "instructions" on the site. I took a few patterned papers and paper from an old newspaper. I randomly ripped strips from the papers and glued +these down with gel medium.Next i stamped all over it using my large diamond checked stamp.
Then not quite sure how to continue I left it be for a week and worked on other pages.When i came back to it, all I did was randomly layed white gesso onto the page and then I drew a face with biro(using a magazine image as a giude to where her features should go.)I then gave her a tribal feather headpiece and then covered the excess gesso with orange paint. Lastly I cut the word adventuerer and leader of the pack from a magazine and glued it down.
:)

Monday 12 July 2010

A quick idea. Art journaling club

Would anyone be interested in taking part in a virtual art journaling club? What would happen is every saturday one of the members creates a background and scans it in or takes a photo& posts it on their blog. Then that person continues to work on it. All the others go onto the sote, print out the background & complete it in their own way. Then we all upload our images by the end of the week & voila!!
If you are interested... Leave a comment& i will organise. :)

Friday 9 July 2010

I have a few new products(YAY!!)....


A few days ago, I went to this amazing little craft shop, that sold so much cute stuff. It was really hard to limit myself to a few things.In the end, i left the shop with one bottle of cosmic shimmer mist, a Tim Holtz Distress Ink pad and a new paintbrush. I am also including gel medium and Gesso to this post,as I just got them a few weeks ago.
The paintbrush is a flat bristled brush in size 4: this brush is fab, you can do dry brushing with it and treat it rough, as long as the brush is cleaned properly at the end, it will last for a long time. This is my new favorite brush.
My Gel medium in gloss: is my new bestfriend. You can use it to create texture(combined with paint will add colour), its a great glue and can even be used to create image transfers,
The white Gesso: is a worthy investment and very different from acrylic paint. It can be used to cover up the whole layer underneath, but it can also be applied in such as way, that parts of the underneath layer shine through. Dry brushing works really well with this.
The Distress Ink Pad in vintage photo: is a lovely colour and so far is great to use around the edges of my journal pages.I want to do a bit more experimenting with this, as I just got it the other day.
Lastly the Cosmic Shimmer Mist in Gold is so .... well shimmery. You can use it as I have done on the journal page above, in the background to add the wow factor to your pages. I want to experiment with this as well.

Have you ever used any of these products? If so what do you think of them? Please share in a comment below.:)))

Monday 5 July 2010

Book review and upcate: Creative Wildfire by L.K.Ludwig


I have been on a mini road trip away from the computer. I have had a lovely time, reading books and coming up with creative ideas. I bought this fabulous book and will now review it for you.

I picked this book up because it had a lovely vibrant cover page, but when I saw the title: Creative Wildfire: An introduction to art journaling-basics and beyond, I thought it would be to basic for me. I was wrong though, it is full of fab content. This book is divided into 6 chapters. I will give you a rough outline of what is in each one.

Chapter 1: gathering fuel: How to get started
This first chapter is about choosing a journal structure and the how to on a few different ways to bind an art journal.

Chapter2:
The tinderbox:page surface techniques
This chapter contains many cool and new to me techniques such as scraped paint,reductive stenciling, different ways to work with gesso, and more. Each tutorial is easy to understand and offers a million suggestions for altering the idea. This book is full of ideas.

Chapter3: Building fire: Using Imagery
Also full of ideas on ways to add imagery through collage,image transferes and new ideas such as drawing on images, printing onto tissue paper and gelatin mono printing.

Chapter4: Bursting in into flames: Creating meaningful content
ideas about sources for fodder, topic art journals,begin with masters, how to stop creative block and more.

Chapter5: Feeding the fire: adding details
Ideas on how to use text, add pockets, envelopes, tabs and embellishments.

Chapter6: Keeping the fire burning: Fueling your creativity
This is about artists dates and finding the time to be creative.

Each chapter also contains interviews with many artists such as Katie Kendrick, Teesha Moore and Misty Mawn.

This book is very inspirational and leaves me bursting with new ideas. I think it is the perfect book to bust you out of your creative blocks and is therefore essential to every art journalist.

Friday 25 June 2010

End of week round up 25.6.2010


My latest journal pages( check out and try the photo mono printing, if you want me tp post a tutorial on photo mono printing, just leave a comment,)

Hello
First of have a lovely summer!!! The warm weather has just kicked in for good where I live, so i hope this will open a whole new door to my creativity: getting inspiration from the great outdoors.

But for today I want to bring you all the creative things that have been passing my mind lately. first of all this amazing video by journalgirl, about reflecting on your day is super inspiring when you need a topic to journal about and it has already made my art journal more true and juicy.


Click to make the above image bigger, it was inspired by her video:
www.ustream.tv/recorded/7661471

Then these two links have a lot of potential: how to make flowers to use in art and a magazine canvas. Check them out.

The photo mono printing journal page is also my Grid page prompted by GPP Street team prompt. I just created a grid around my photo mono print, which I had doodled on and then in each grid a drew, doodled or wrote the first thing that came into my mind. This was a cool exercise.(click on the yellow journal page at the top to get a bigger picture).

To finish off some ideas on my todo list:

1. a journal page in red
2. create a zine about animal rights
3. make and use some homemade clay
4. Make some artists trading cards
5. Art outside
6.work on my secret journal house(i will be sharing my slow progress soon.)

Have fun!!!
One last question to every one plaese leave a comment with the answer, I will post a comment with my answer in it:
What is your all time fave art supply and why?

Thursday 10 June 2010

Art must haves for journaling in the garden


So a few posts ago, I posted a very cool page I create in the garden. I LOVE DOING So during the summer. IT is just so inspiring and fun! So, if you want to spend some time makin art in the garden, just grab a little table and chair or sit at your picknick table. Now garb a lunchbox and fill with goodies:
  • Camera(to take inspiring photos)
  • acrylicpaints( TO paint with:))
  • suncream(you dont want to get burnt and it can be used like gelmedium as a glue)
  • paintbrushes and water
  • pens for journaling

I only use these basic supplies and then just create whilst listening to craftpodcast such as craftsanity and craftypod. What pod casts do you like to listen to?

Tuesday 8 June 2010

Arthistory Crashcourse part 1: Impressionism


I am launching a brandnew series about art history. Every tuesday, I will bring you the history on a time period, artist, art matêrial or piece of art.


The Impressionism offically started in the mid 1860's, when the first exhibition was launched containing impressionist pieces by artists such as Monet, Degas, Cezanne and van Gough.It was a personal way pf portraying the light and colours of the world.The art style was more about painting a reproduction of the true spirit rather than coüpining nature down to the barest detail. I think that art journalers can learn from them that you should depict the world as you see it and never be afraid to include the truth no matter how ugly that might be.
Impressionism is baout how the artist sees the world in that very spilt second and the ever changing reality. Colour was very important, ^the colours should convey the atmosphere of busy life in pure brilliance. It became more popular to go out in the fresh air and to paint face to face rather than being in a studio. These artists also figured out that the sun is not a single colour, but a sum of pure chromatical values.Light was important to impressionists and they use brush strokes to represent the vibrations of light.This could make a fun prompt: try painting a scence, by onld painting in the light or apply a thick layer or paint and then consoiusly create brush stroke texture.
Black became regongnized as a colour of its own and was no longer banished from the palette.Colours were applied in fantastic new techniques that either allowed them to blend or spilt the dark from the light.Basicly they paint reality as it is in the eyes of the painter with emphasis on light and colour. I think this is a cool attitude to have towards art journaling to.
I hope you have enjoyed this brief history crashcourse, as you have noticed, I will throw in some artsy inspirational ideas that came to me when I learned about it.
Now go make art!!!! Do you want to adda ny ideas you get from impressionism, please comment below and share.In order to promote commenting on my blog, I will post everyone's blog adress on my side bar, who leaves a comment.¨
XXO MAKEALIFE

Sunday 6 June 2010

Get outside that studio!!!


My work space outside, a pretty flower,a photo and the painting of the thing I painted.


Today it was warm weather and I had time and I had no ideas of what art I should create, so I went outside. I have a table and chairs outside, so I grabbed a few supplies: my art journal, camera, ipod,acrylic paints, watersoluable pencils, pain tbrush and water and a pencil. Then I simply sat down and started to create a wonderful impressionist painting of this part of my garden.I focused on the wonderful colours and basic shapes of the painting. I let go of thinking, oh that isn't very good and I think that itz turned out great. Yes, I know it does not look really realistic, but I love it. My painting really captures the colours of my garden. The coolest thing is that now that the light has changed, the colours did to, so I have captured my garden in an absolute unique way. The colours will never be the same. Try this experiment to, I took a photo and compared the colours, guess what mine were nicer, more saturated and just generally more realistic, colour wise. Ask yourself what do you feel, is the colour and feel more important to you or is it more important to you for the image to look realistic.To me, the first is way more important when it comes to art.


I dare you to try it to, grab your fave supplies and head out to your garden to create an impressionist painting or some fab photos. Another new thing I ma in to lately is Craftsanity, a fab podcast.I especially love the episodes about artistic people. I love listening to podcasts whilst I create art.

Lastly sorry I have been away for a while, but first I went on a trip to italy and then lately, Until now i did not feel like blogging and to me, it should be fun. But I am back!!! YAY!!!!Here are somethings that will be coming up lately:

  1. Some info on great artists, both from art history and present day people.I am hoping to interview some people to, so if you are interested in being interviewed please leave a comment.
  2. Ways to grow as an artist, such as how to start my own spin on summer projects
  3. More things about art quilting and other creative fabric things
  4. How to get active about animal rights( check out www.peta.org.uk )
  5. Awesome links

Please leave a link to some art you have done outside.:)

Makealife

Monday 24 May 2010

Quick prompt 24.5.2010


Drawing really helps you grow as an artist. I think everyone should draw something at least once a week. I do. I sit down with one of my friends and we draw say the pot in front of us. When we are done, we compare and talk about our drawings. You should try it.
Here are my fave drawing links:

Here ,
here

have fun!!!!!

Sunday 23 May 2010

End of week links 23.5.2010

I will post a few of my fave links at the end of each week from now on.

Lets start with daisy yellows 20 things dare, the comments are bursting with inspiration on cool things you could use in your art journal here and here. Have fun with thema nd be sure to comment to.

Over on paperphantom she shares an awesome idea about using foodcolouring and water to create an awesome bubble effect on paper. This would be perfect for a journal background or as patterned paper.

This is a super idea to, painting on brown paper. Who would of thought it could hold so much paper?

If you have never t¨ried splattering in your art journal, this will make you want to.

Friday 14 May 2010

Using your electronics to help your art!

Yes! I admit, sometimes I'll go on the computer and get sucked in for hours, when all I wanted to do was get some quick inspiration.But there are some things gadgets can really help you with.

Computer:

  • If you just need inspiration a tip:Google the first thing that comes into your mind, but search the images. As soon as you have found one to your likeing, print it out and switch your computer off. Now see where this image takes you...
  • Search for quotes you could use in your art
  • Set yourself say 10 mins(on a timer, i use the one on my phone) to surf the internet and then go off and be creative
  • If you have just bought a new art supply, search it in google, till you find a cool technique and then go and try it out
  • Print out alphabet sheets: Just go onto word, select a font and blow it up to the size you want, now print and voila!You can now cut these out and use in your Art journal

Moblie Phone:

  • Use as a timer for the above
  • Connect it to your computer and print and use the photos on it. Your phone will have the best (not best quality) photos on it, as you can just grab it and snap a picture when it seems right

Iphone:

  • Listen to music
  • Get a quote app, randomly select a quote and use this in your page
  • Keep a list of things you love or hate or something like that and use this in your art

Those are my ideas on this subject, if you have any ideas please leave in a comment below also leave any requests for futur blogposts below.

MAKALIFE xo

Saturday 8 May 2010

How to create a Inspiration board


An inspiration board is a very important iteam in any crafty or artistic persons life.On this board you will pin everything and anything that inspires you. Then when you need a little boost with your creative flow, grab an image and go from there.

You will need:

Things that inspire you
Pinboard
pins

1. Gather quotes, images(from fashion magazines or artwork you admire), colour samples, postcards, photos, emphemera from your daily life, fiber and fabric, numbers, letters you like absoloutly anything!

2. Arrange the clippings in a way you like: this can be in catagories like fashion, art and nature, by colour, size or just however looks right

3. pin thesedown and use as inspiration.

SO How can this help inspire me?

  • You could write a story based on one of the objects, this could be a made up one or why and how it inspires you
  • Use this image as a base for a collage
  • Let the theme or colour of a picture inspire your next creation
  • Draw the image
  • Capture the feel of it on a page
  • Use the quotes of lyrics in an art journal page
  • Use that awesome picture of a lacebag as inspiration for your next skirt
  • If it is a fabric or fiber swatch, use this fabric in your next project

And there you go, an inspiration board is basiclly the place you store all the inspiration you get, when you are to busy to use it and the place you raid for ideas, when you have time but no clue what to do. How do you use your inspiration board?

" Spring is natures way of saying lets party!"-uNKNOWN

Friday 30 April 2010

My Anti Cosmetic animal testing painting and some cool ideas to use in your art journal


I love this painting, the first half is a normal girl and the other half is what she would look like if she had to go through the painthat animals do, just so we can look"PRETTY"?!

Here are some ideas For art journaling that I am loving:

  • work with some ink and just add a few accents to your pages
  • practise drawing
  • think outside the box, look at every material as a potential piece of art journaling gold
  • cut and paste down a random sentance from a book and use this as your prompt
  • buy yourself a pot of gelmedium and experiment
  • use paper chains(handcut) in your backgrounds
  • Date your art work
  • experiment with splatters

Have a good and creative weekend!DO you like it when i just post a piece of art and some prompts or should I give you more techniques or something?

Wednesday 28 April 2010

Prompt:Childhood friends


(Click for a biger version)

Did you have a favorite childhood toy? An object you thought was real?I did. I had this cute Bunny Rabbit called PEter Rabbit. Todays prompt: document this childhood friend. If you have a photo, stick that in, if not try drawing it from what you remember it was like or draw how you remember it feeling like.
I think this is really fun to, just play in my art journal and let myself explore meyself.Start with small things like toys, fave tv shows, books ect. Then dig deeper.What are you passionate about and waht are you opinions on religion, technology ect. Experiment with writing, using quotes, lists or even drâwing a comic strip.
Have fun

Monday 26 April 2010

Check this out

Awesome!
http://vimeo.com/teeshamoore

Love the tutorials for fabric journals!!!Go tesha Moore gogog!!!!!!!!

Book review: Mixed Media Mosaic by Laurie Mika


This was one of those books where you have just found an amazing book shop and as you browse the aisle looking for nothing like this, you find a magical book.Above you can see the title page and my very first attempt on making a mixedmedia mosaic box.It was so fun!
But what kind of stuff is inside?
Well, all the instructions come with photos and are very easy to follow. Though I think this is more a book where you read everything through and then just experiment.Any one can follow the instructions. Look at my box , I am a complete beginner in mosaic and look how cool it turned out, even if I do say so myself.Back to the book,it starts of by showing you how to use a few diffrent techniques in your mosaic making. She makess hers from polymere caly and also uses bought glass and clay tiles. She shows yu how to cut, paint and stamp on bought tiles. Then she shows us how to make your own basic tiles, how to transfere onto them, paint them, add little extras such as mica powders and gelpens.Then leran a few reallly cool ways to use mica powders and stamps and how to add beads to your tiles and much, much , much more.

Her next chapter is full of inspirational project ideas such as using the tiles to decorste a box, mirrow, make jewelry or create shrines.

This is an absoulute gem of a book and i think that evry art journal/mixed media artist should own it.Also one tip from me: I wanted to get started, but I did not have any mica powders, so instead I used artists pitt pens in brush and then wiped them with my finger, to create a matt, subtle colour like on the tile, on my box, with the x through it.

Avalible on Amazon:

XXo Makealife

Thursday 22 April 2010

Earthday: Go green and save he earth and animals

Today is Earthday, yay! So please please do your bit for animals or the enviroment today.There are so many simple things you could do today:

  • Go on threadbanger and watch this for some places where you could find eco friendly clothing and accessories


    Check you cosmetics for cosmetic animal testing and download this fab app for your iphone(http://itunes.apple.com/us/app/cruelty-free/id313825734?mt=8) its free!!!
  • Reuse old thing in your art: cut of trimings and buttons from old garments, join stash swaps with your friends, reclaim the matierials used in you WIPs
  • Cut up old magazines to create collage and find other ways to recycle in art like many of alsia burkes creations(http://www.alisaburke.blogspot.com/ )
  • Switch off unused applications and lights
  • Bring your own bag shopping
  • Use old books as art journals or make your own from recycled paper
  • Buy recycled stationary( I have some reviews coming up)
  • Use flowers,leaves and other natural things in your art
  • Create staemeent art to show people how bad things are
  • Support charities
  • Eat less meat
  • Buy organic food and make your own over buying

These are just some supersimple ideas, so please do at least on of these or another earth or animal friendly thing today and remember, your art is your voice to.Chronicle where you found that nice veggie resteraunt or eco friendla hair salon, make art about the animals you saw today, inform your self about how bad your art supplies are for the enviroment and make some changes, use natural collage elemsnts and use rubbish such as old tickets from your everyday live and get active!!!!

Tuesday 20 April 2010

Prompt yourself up part 1


A new series:Prompts from my head to inspire you to create art in your art journal and in other mediums.Try exploring possiblities such as clay, canvas....If you dont have any clay, why not make some salt dough clay?Be crreative!!

  1. Use your art to document a favorite childhood toy
  2. Tell a story about a family member such as your grandma
  3. Create a self portrait.It is open wether you want to grab a mirrow and do an exact study of your face or if you just want to capture your identity in an abstact image
  4. Think of a few key points in your life and create art about them= artistic biography
  5. Explore your mind set on consuming, religion, animal rights and the like
  6. Take a photo of you wearing an outfit you like and explore why
  7. Use things from your everyday life such as stamps, ticket stubs and candy wrappers.Why not try to get one piece like this per day and collect and add to your journal
  8. Draw something once a week, to improve yoiur drawing skills

Have fun!!!!

Tuesday 13 April 2010

Start drawing 1


Here is a quick drawing of my cats head whils he was lieing on the chair.It was so fun, but at the same time hard as he kept moving.I am not really a good drawer but after listening to this fab podcast(http://dannygregory.libsyn.com/), I really wanted to draw.So I am going to make it a weekly practise, that I draw at least one drawing per week.Drawing really lets you grow artisticly and dicover yourself.All you need is paper, a pencil(I recommend 2H) and a rubber(I recommend a kneadable putty rubber).So i will be posting a few drawing prompts over the next time.Starting today:

DRAW YOUR PET OR HOUSEPLANT OR ROOMIE AND WRITE YOURSELF POSITIVE AND CONSTRUCTIVE CRITASIMS, SO YOU CAN WORK ON THE BAD PARTS AND BE HAPPY ABOUT THE GOOD PARTS:)

Wednesday 7 April 2010

Etsy Loves 7.4.2010


Cute art doll made with Air dry clay can be found here


Super cute art doll made from fabric and plaster with moveable polymere clay arms.Can be found here


This super cute Forest girl painting can be found here and was painted by marisolspoon.


This cute nurse kitty was painted by tanyabobd and can be found here


StudioWednesday 7.4.2010


I have decided I will not post my art pages on thursday.I will post them whenever, but
I will do so once a week.Okay guys?
Anyway:
Below is my first art journal page in my new handmade art journal,I have already done way more but I am always abit behind with uploading photos.But who cares? I did this page by first taking my neocolour IIs and appling them to the background and adding water so that you get that lovely blend of colours. I love having lots of colours on my pages.Then i tried out tape trasfer for the image.The way you do so, is take some clear packaging tape, the wide kind and laying the image onto it.Wet this and rub off the back layers of your image.This leaaves only the top layers of paper and therefore the image on the cellotape.The reason I have lines going through mine is because I did not have wide tape , so I had to improvise with normal tape.I still think it turned out fab, don't you? I want to buy some clear packaging tape, so I can try again.

After doing all this, I sat infront of the telly with scissors, a glue roll(very handy) and my box of patterned papers.I just sat there and cut and pasted pretty images the whole evening.Very relaxing. At the end of it all I decided not to add any words as I find this page is like a picture of some secret coloured water.The girl looks like she is under water and it seems to tell me a a million things without any words and i did not want to ruin this.I really like this page.

The next one, is my version of journalgirl's prompt(what makes a miserable art journaler?).I used many layers of paint and paper scraps to gat the background, but I really do like the background.Then I just added my list :

  1. 1.She tries to exactly copy other peoples art.Just copy the elements you lika nd combine into your own style.
  2. She tests everything out before doing it. You should react frominstinct. Your art journal is you place to be free from judgement on how good things are.
  3. Isn't ever happy with what she creates.Sure we don not always create good pieces, but If you dont like the page, you at least liked the process right?
  4. She does not capture her personality and feelings in her art journal
  5. She always does the same basic thing. So say, text in corner and picture at top.Have fun and play with placemnt¨
  6. She lays one layer of background and then is done.Layer you back grounds.Layering is fun!
  7. She plans out her next page!Just be creative

At the moment I am challenging myself with daisyyellow april creative challenge, Make a list of 100 ways to use a paintbrush!It is hard,but very funa dn really makes your brain think creatively!I have 25 ideas so far!!!:)